Introduction to Fly Tying
Fly tying is an essential craft that complements the art of fishing by creating artificial lures to attract fish. This intricate method of crafting flies is not just a hobby but a timeless tradition that blends creativity with practicality. By utilizing various materials and techniques, anglers can design flies tailored to the specific characteristics of the fish they wish to catch. Engaging in fly tying opens up a world of customization, allowing fishers to replicate what nature offers, thus enhancing their fishing experience.
What is Fly Tying?
Fly tying refers to the process of creating artificial flies that resemble insects, baitfish, or other organisms that fish feed on. This practice is central to fly fishing, as the goal is to craft a lure that mimics the movement, color, and size of the prey. Each fly consists of various components, including hooks, threads, and materials that mimic the features of natural food sources. By tying flies, anglers can increase their chances of success based on the preferences of their fish targets.
The History of Fly Tying
The craft of fly tying has a rich history that dates back centuries, with its origins believed to be in ancient Greece and China. The first recorded instances of fish lures being created can be traced to a book published in the 14th century, detailing methods for catching fish. Over the ages, fly tying evolved significantly, from simple hand-tied creations to the sophisticated, intricate patterns we observe today. The art has been passed down through generations, with various cultures contributing their techniques and styles, making it a vibrant tapestry of fishing heritage.
Why Fly Tying Matters in Fishing
Fly tying is crucial in the fishing world for several reasons. First, it allows anglers to produce their lures tailored specifically for the fishing conditions they encounter, such as stream type, fish species, and seasonal changes. Second, tying your flies fosters a deeper connection to the sport, enhancing the overall fishing experience by allowing one to engage intimately with the materials and processes involved. Lastly, handcrafted flies often outperform store-bought ones, as they can be designed to replicate the exact insects or baitfish found in a given body of water.
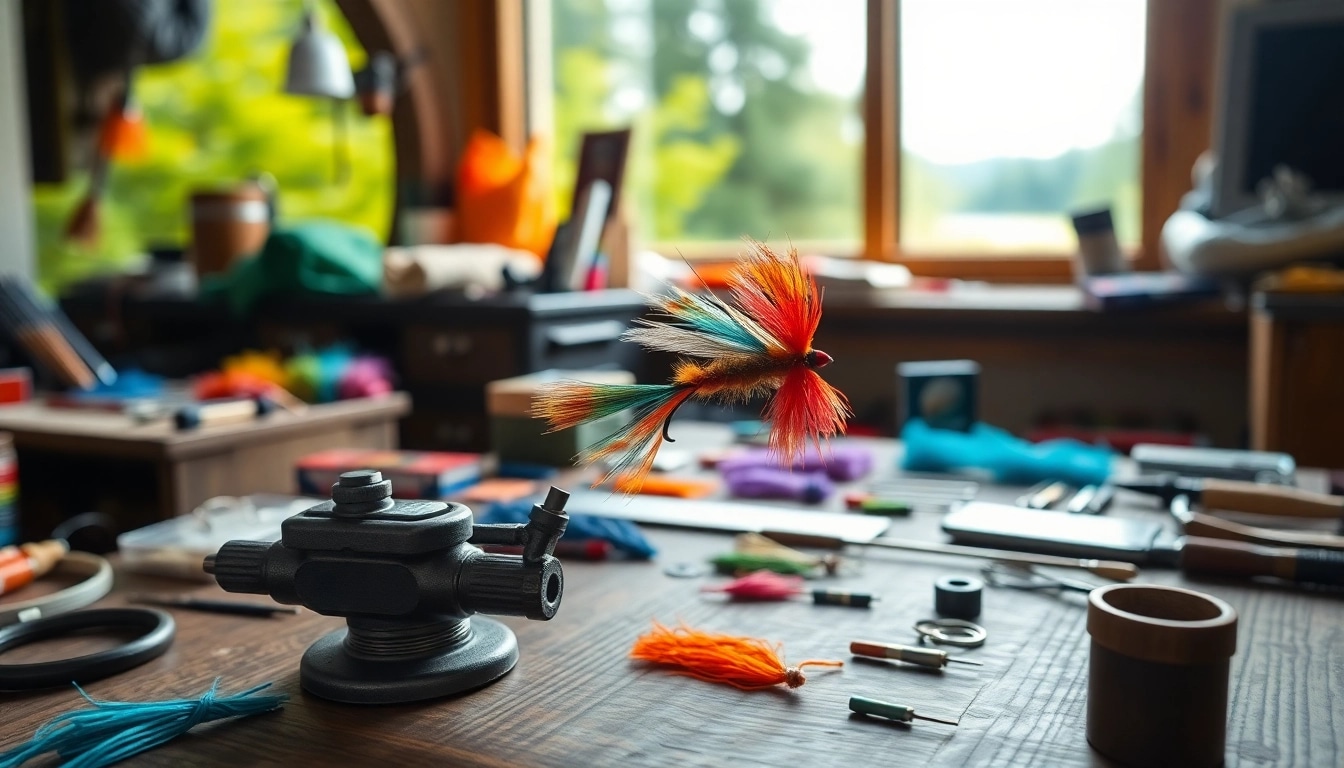
Essential Tools for Fly Tying
Basic Tools You Need
To start your journey into fly tying, you'll need some essential tools:
- Vises: A quality vise secures the hook in place while you work.
- Scissors: Sharp scissors are vital for trimming materials accurately.
- Bobbin Holder: This tool keeps thread taut while you tie your flies, ensuring precision.
- Hackle Pliers: Useful for gripping and positioning materials on the hook.
- Whip Finisher: A whip finisher tool helps secure the thread at the end of your fly.
Advanced Tools for Experienced Tyers
As you become more adept at fly tying, consider adding advanced tools to your collection:
- Rotary Vise: This allows for thorough access to your fly, enabling intricate designs.
- Dubbing Twister: This tool helps create unique dubbing loops for specialized patterns.
- Material Clips: Essential for keeping materials organized while you tie.
- UV Light: For curing UV resin flies quickly and effectively.
Maintaining Your Fly Tying Equipment
Maintaining your fly tying tools is crucial for ensuring a seamless tying experience. Clean your vise and tools regularly to prevent corrosion and buildup of materials. Proper storage is also important; utilize tool organizers or cases to keep everything in one place, minimizing wear and tear. Check for wear and damage, particularly on scissors and bobbins, and replace them when necessary to maintain precision and efficiency.
Fly Tying Materials Explained
Natural vs. Synthetic Materials
In fly tying, the choice between natural and synthetic materials can significantly affect the effectiveness of your flies. Natural materials include feathers, fur, and hair. They provide organic movement and appearance, mimicking live prey. On the other hand, synthetic materials such as plastic fibers and foams are often more durable and easier to work with, offering vibrant colors and consistent textures. The decision depends on the fly pattern you are creating and the fish species you intend to target.
Choosing the Right Hooks and Threads
Selecting the appropriate hook is fundamental in fly tying. Hooks vary in size, shape, and gap, targeting different species and fishing conditions. For instance, dry flies usually require a lighter wire hook, while streamers might call for a sturdier option. Threads also play an essential role, with various sizes and strengths available. A heavier thread is advantageous for larger flies, while finer threads work better for delicate patterns. Additionally, the color of your thread can add extra visual appeal to your fly.
Innovative Materials to Enhance Your Flies
Recent advancements in fly tying materials have opened up new avenues for creativity. For example, using UV-resin can provide a glossy finish and added durability. Additionally, materials like holographic tinsel and rubber legs can add dynamic movement and texture to flies, making them more appealing to fish. Experimenting with various innovative materials allows you to stay ahead in the game and enhance your fly designs significantly.
Basic Techniques for Fly Tying
Getting Started with the Fundamentals
To become proficient in fly tying, mastering the fundamentals is essential. Begin by learning basic knots, as they are foundational for securing materials. Familiarize yourself with various fly patterns, as many techniques will overlap with these designs. Start with the simplest patterns; dry flies and nymphs are the best options for beginners to practice.
Common Mistakes to Avoid
Even experienced tyers can fall into traps when creating flies. Common mistakes include overly tight or loose thread tension, which can strain materials or cause them to slip. Another frequent error is using inappropriate hook sizes for the intended fly pattern, affecting the fly's performance. Additionally, failing to select suitable materials can lead to ineffective flies. Taking the time to plan and double-check each step helps mitigate these issues.
Step-by-Step Guide for Beginners
Here’s a simple step-by-step guide to tie a basic Woolly Bugger:
- Secure the hook: Place the hook in your vise, ensuring it's secure.
- Attach the thread: Start the thread just behind the eye and wrap it down to the hook bend.
- Add the tail: Select a material such as marabou, cut it to about one and a half times the hook length, and tie it in at the bend.
- Attach the body: Use Chenille or dubbing to form the body, securing it every couple of inches with thread wraps.
- Wrap the hackle: Select a feather and tie it in, then wrap it around the body to create a bushy appearance.
- Finish: Whip finish the thread, trim any excess, and ensure everything is secure.
Advanced Fly Tying Techniques
Customizing Your Flies for Specific Fish
As you progress in your fly tying journey, customization becomes essential for targeting specific fish species. Consider the fish's feeding habits, local prey availability, and water conditions. By adapting colors and sizes to reflect the patterns and life stages of local insects, you can create flies that are more enticing to fish. Keeping a log of successful patterns and conditions helps refine your approach over time.
Creating Unique Patterns and Styles
One of the most rewarding aspects of fly tying is the ability to create unique patterns that stand out. Take time to experiment with color combinations, material choices, and varying techniques to develop what works best for you. Layering different materials and textures can create visually stunning flies. Innovative designs can attract fish that may not respond to traditional patterns.
Showcasing Your Fly Tying Creations
Once you've crafted beautiful flies, showcasing your creations can enhance your fly tying experience. Many local clubs and online communities host competitions that allow tyers to share and gain feedback. Additionally, documenting your flies through photography or video can help other enthusiasts and establish yourself within the community.
FAQs about Fly Tying
1. What materials are best for beginners in fly tying?
Starting with easy-to-use materials like foam, marabou, and synthetic fibers is recommended for beginners.
2. How long does it take to get good at fly tying?
Improvement in fly tying varies, but consistent practice over weeks or months can lead to significant skills development.
3. What types of flies should I start tying?
Focus on simple dry flies and nymphs, as they are versatile and commonly used in various fishing conditions.
4. Can I tie flies in different sizes for different fish?
Yes, varying the size of flies allows you to target different species effectively, adapting to fish preferences.
5. Is there a community for fly tying enthusiasts?
Absolutely! There are many forums and local clubs where you can connect with other fly tying enthusiasts and share tips.